

DIY Cardboard Loom Bracelet

(Picture: Beth Huntington)
Fellowship one of life's most valuable endowments. At the point when you need some assistance, a listening ear, or a decent snicker, our besties will consistently be there to help us through the great occasions and the difficult situations. Particularly those companions who have been close by since youth, sharing recollections like summer bicycle rides, sleepovers in the back yard, and making fellowship armbands. In the event that these pleasant bangles were a piece of your youth, presently could be the ideal time to show this straightforward weaving method to the youngsters you love. It's helpful, unwinding, and fun. Get somewhat cardboard, some bright yarn, locate a comfortable spot and get the chance to take a shot at a couple of armbands for yourself or make a couple to send to those sidekicks your kids may be missing at this moment.
In the event that making companionship armbands was a piece of your adolescence, presently could be the ideal time to show this basic weaving procedure to the youngsters you love.
(Video by Youtube: eHow)

Things You'll Need
- Void cardboard box (wafer, oat or pop)
- Round cup
- Stamping pen
- Scissors
- Different shades of yarn

Stage 1
Follow around a round espresso mug on the rear of a vacant cardboard box. Cut out the circle.


Stage 2
Imprint eight little lines around the circle that are equivalent separation separated. Cut a little score on every one of the lines. Mark with the numbers 1-8.

Stage 3
Cut seven bits of yarn that are 25 inches in length. Spot them together and tie a bunch in one end.


Stage 4
Utilize a pen to jab a gap in the focal point of the cardboard circle and string the hitched finish of the yarn through the gap.


Stage 5
Spot one bit of yarn into every one of the seven scores. Leave one score vacant.

Stage 6
Check three indents from the vacant score. Remove the third string from the indent and spot it into the vacant score. (Spot number 3 string into the number 8 indent)


Stage 7
Check three scores from the recently shaped void indent. Remove the third string from the indent and spot it into the vacant score. (Spot number 6 string into the number 3 score)

Stage 8
Keep checking three indents from the recently shaped void score and putting that third-string into the vacant score. Each once in for a little while you'll have to pull down on the bench underneath the cardboard. As you keep on weaving along these lines, the armband will begin to show up on the underside of the cardboard.


(Picture: Beth Huntington)

(Picture: Beth Huntington)

(Picture: Beth Huntington)
Stage 9
At the point when your wristband is the ideal length, expel the entirety of the yarn from the scores and haul the tied end out of the opening. Tie a bunch in the opposite end.

(Picture: Beth Huntington)
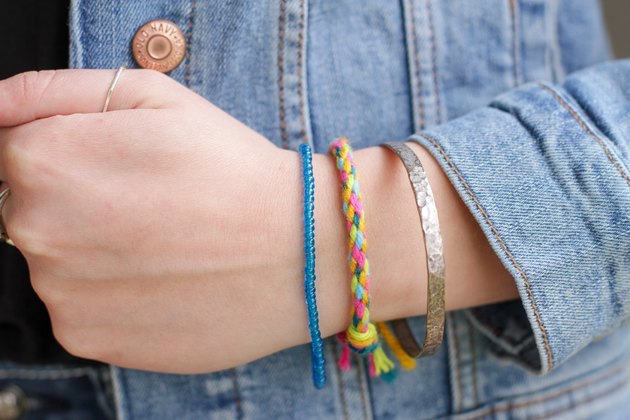
Stage 10
Tie the armband onto your wrist and pair it with a couple of different bangles or offer it to one of your besties.
(Picture: Beth Huntington)

(Picture: Beth Huntington)


No comments:
Post a Comment